Preparations before Coding
If you want to use Micro:bit to control the MU Vision Sensor, you need to import the MicroPython firmware that contains the ‘MuVisionSensor’ module. Please follow the steps below:
(1) Download the firmware:
GitHub: https://github.com/mu-opensource/MuVisionSensor3-MicroPython
Official Website: http://mai.morpx.com/page.php?a=sensor-support
(2) Flash the firmware:
Connect the micro:bit to computer via USB cable,and drag the downloaded frimware “microbit-micropython-MuVisionSensor-0.8.0.hex” to MICROBIT disk. Micro:bit will flash the new firmware and restart.
(3) Download and install Mu Editor:
Mu Editor is a simple Python code editor for beginner programmers with friendly GUI.
It can be downloaded in the main page: https://codewith.mu/
(4) Import module
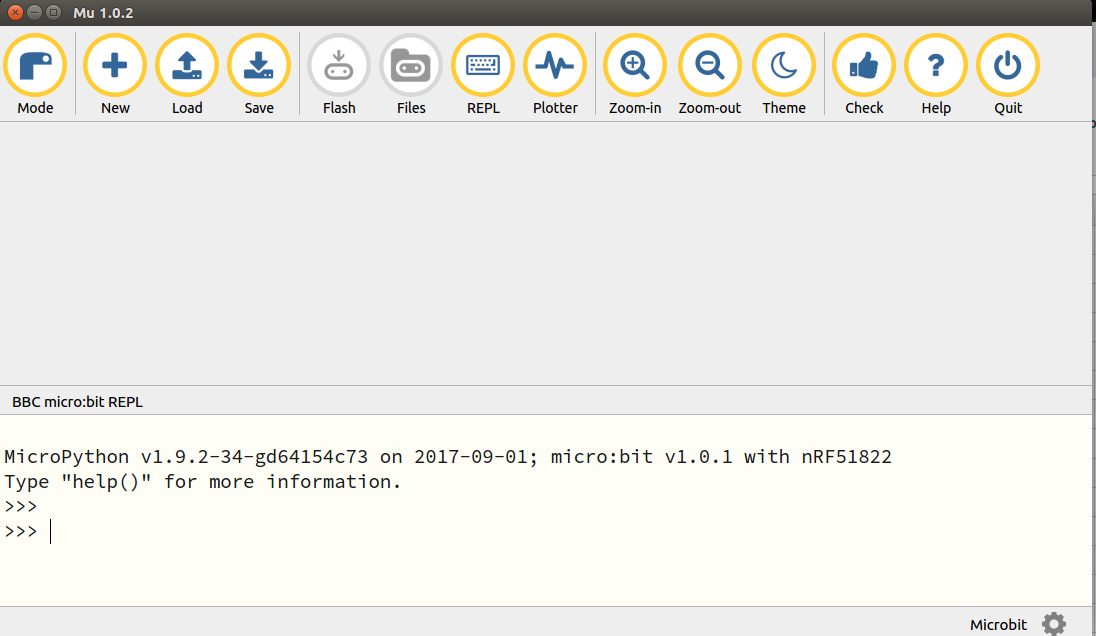
Open Mu Editor, change the mode to BBC micro:bit,and click the”REPL”button to enter serial reply mode.The micro:bit will send firmware version at first. Type the code below and press enter to run
>>> from MuVisionSensor import *
Now you can call all the public APIs in ‘MuVisionSensor’
Key words auto-completion fuction is only available in REPL mode.
Connect to Micro:bit
MU Vision Sensor 3 periphrals and ports:
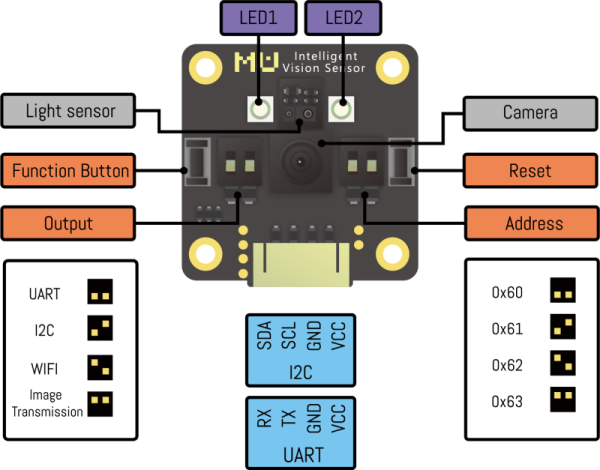
I2C Mode
(1)Output Mode DIP Switch: set switch 1 downwards and switch 2 upwards
(2)Connect the output Pin1(SDA) to the Pin20 of Micro:bit, and Pin2(SCL) to Pin19 of Micro:bit. Also connecting the ground pin and 3.3v power pin to micro:bit.
(3)Change the I2C address of MU Vision Sensor by resetting Address DIP Switch. In default both switches are downward and the address is 0x60. (Changing this setting is not recommended)
Only I2C mode is supported now.
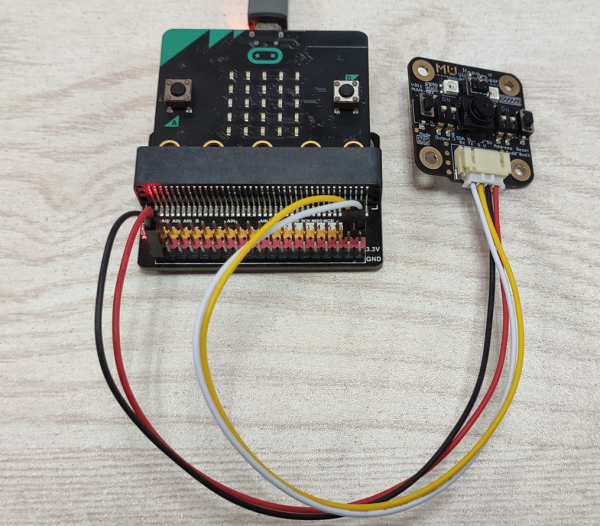
You may need a shield to connect MU to Micro:bit, as is shown below:
Usage of APIs
Initialize MU Vision Sensor
Two steps to initialize this sensor:
Step1. Call the ‘MuVisionSensor(‘address’)’ to create an object , the value of ’address’ should be consistent with the setting of Address DIP Switch (default is 0x60);
Step2. Call the ‘begin()’ function to start this sensor;
Enable Algorithms
API
MuVisionSensor.VisionBegin(vision_type)
All available ‘vision_type’s as follows:
VISION_COLOR_DETECT
VISION_COLOR_RECOGNITION
VISION_BALL_DETECT
VISION_BODY_DETECT
VISION_SHAPE_CARD_DETECT
VISION_TRAFFIC_CARD_DETECT
VISION_NUM_CARD_DETECT
VISION_ALL
Example
from MuVisionSensor import *  #import the library
.... #
mu.VisionBegin(VISION_COLOR_DETECT)  #
mu.VisionBegin(VISION_SHAPE_CARD_DETECT | VISION_BALL_DETECT) #enable card detect and ball detect algorithms
Set Performance Level
API
MuVisionSensor.VisionSetLevel(vision_type, level)
‘level’ can be set to:
LevelDefault
LevelSpeed
LevelBalance
LevelAccuracy
Example
mu.VisionSetLevel(VISION_BALL_DETECT, LevelSpeed)
Get Performance Level
API
mu.VisionSetLevel(vision_type)
The return value is between 0~3, which represents the 4 levels
Set White Balance Mode
Adjust the color cast caused by the changes of external light sources.
API
MuVisionSensor.CameraSetAwb(mode)
‘mode’ can be set to:
AutoWhiteBalance
LockWhiteBalance
WhiteLight
YellowLight
Get White Balance mode
API
MuVisionSensor.CameraGetAwb()
The return value is between 0~3,which represents the 4 WB modes.
Set Digital Zoom Ratio
API:
MuVisionSensor.CameraSetZoom(mode)
‘mode’ can be set to:
ZoomDefault
Zoom1
Zoom2
Zoom3
Zoom4
Zoom5
Get Digital Zoom Ratio Setting
API
MuVisionSensor.CameraGetZoom()
The return value is between 0~5, which represents the 6 zoom levels.
LED Settings
API
MuVisionSensor.LedSetColor(led, detected_color, undetected_color, level)
Explanations of these parameters:
led: the LED you want to configure, the available values
Led1
Led2
detected_color: colors which are detected, the available values as follows
LedClose
LedRed
LedGreen
LedYellow
LedBlue
LedPurple
LedCyan
LedWhite
undetected_color: colors which are not detected, same available values as detected_color.
level: set the brightness level; an integer between 0 and 15; the larger the brighter.
Get Results of Detection
API
MuVisionSensor.GetValue(vision_type, object_inf)
The available values of ‘vision_type’ are as mentioned above.
object_inf can be set to:
Status 0 means undetected, 1 means detected
XValue
YValue
WidthValue
HeightValue
Label
RValue
GValue
BValue